
What is the use of Data Validation in Excel? It’s an amazing feature to control and restrict data entry being done by the user in multiple different ways.
For example, using Data Validation in Excel you can allow entry of data in a particular column called City, by only allowing to choose from a drop-down.
So there’s no chance of 1 user entering Mumbai and another user entering Bombay. Both will have to choose from a drop-down only.
This helps in getting structured data from the start and helps in getting accurate reporting.
Also helps in standardizing the kind of data that’s entered in a column.
For example, Quantity column. You only want an entry between 10 and 500. You can’t enter anything less than 10 or more than 500. Very easily possible using Data Validation.
There are some differences in how to use Data Validation in Excel 2007 versus how to use Data Validation in Excel 2010 or Excel 2013
There are a lot of simple and complex validations that can be created. Let’s learn them.
How to use Data Validation in Excel for Simple Criteria
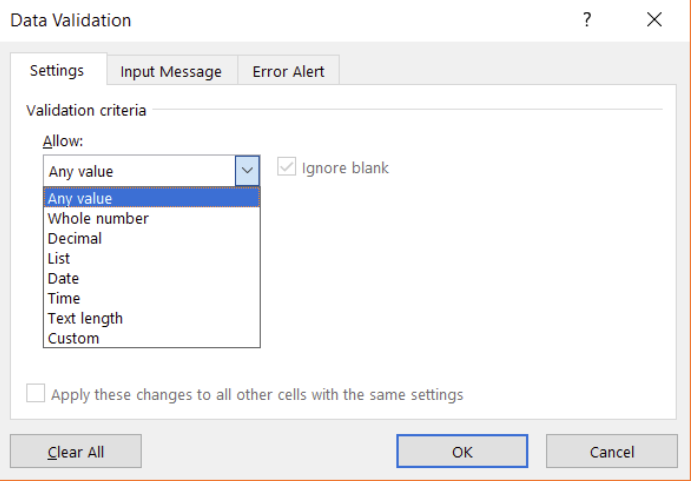
The various direct options for Data Validation are: –
- Whole numbers
- Decimal
- List – Dropdown
- Date / Time
- Text Length
After you choose an option from these, you will get to select additional things.
Except list (dropdown), in all the other options, you will get such conditional choices too,
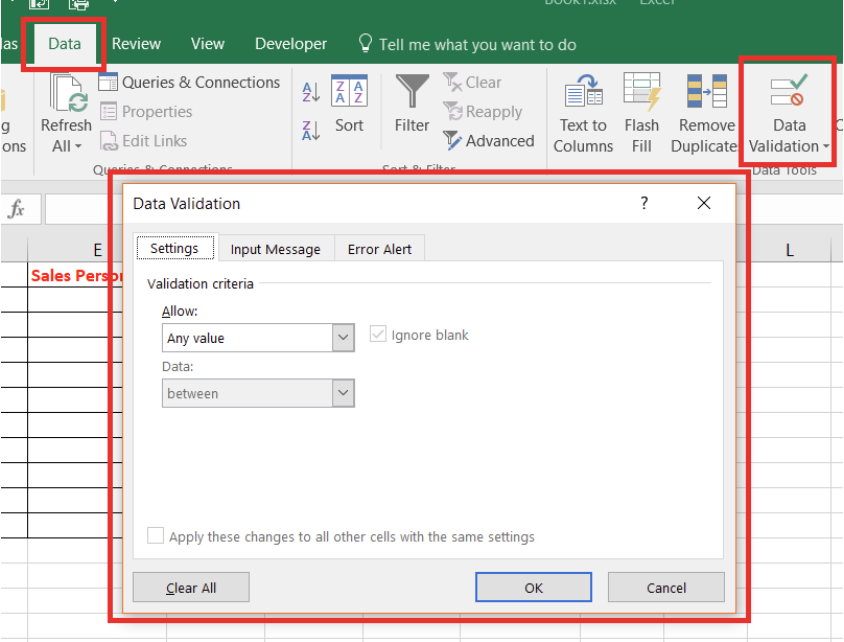
Basic Steps to following when using Data Validation: –
- Select the cells (could be an entire column too) where you want to apply the Data Validation
- Under the Data tab, click on Data Validation
- Then apply the Data Validation as required, based on examples shown here.
- Whatever validation you will apply, that will be ‘Allowed’ for the user to enter.
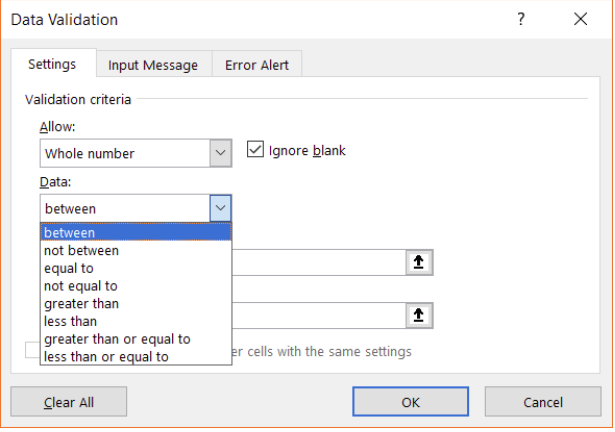
1.) Whole Numbers
You can choose to allow only whole numbers, with any of these conditional choices.
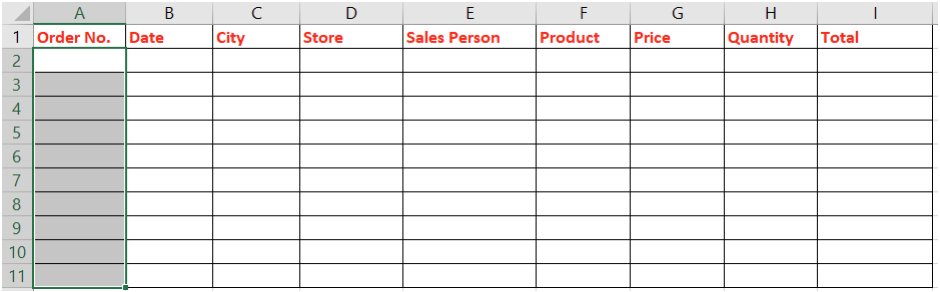
Let’s take an example of this data set, with which you will learn all the areas of how to use Data Validation in Excel.
You want to allow only whole numbers in the Order No. column, where user has to enter a value only greater than 0.
Steps to follow: –
- Select the column

- Under the Data tab, click on Data Validation. This box will open up.

- Under Allow, choose Whole Numbers
- Under Data, choose Greater Than
- Under Minimum, enter 0
- You can alternatively choose Greater Than or Equal To = 1

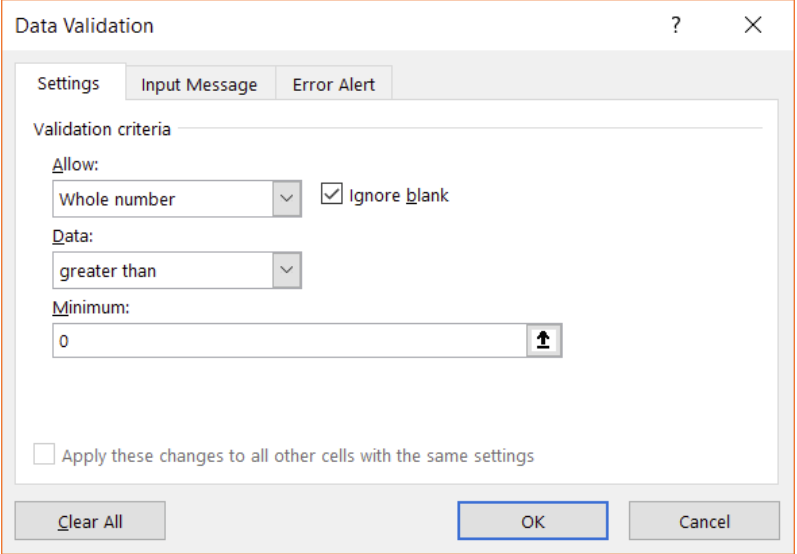
This will ensure that the user can now enter only whole numbers greater than 0.
If you enter anything else, you will get an error message disallowing the entry.
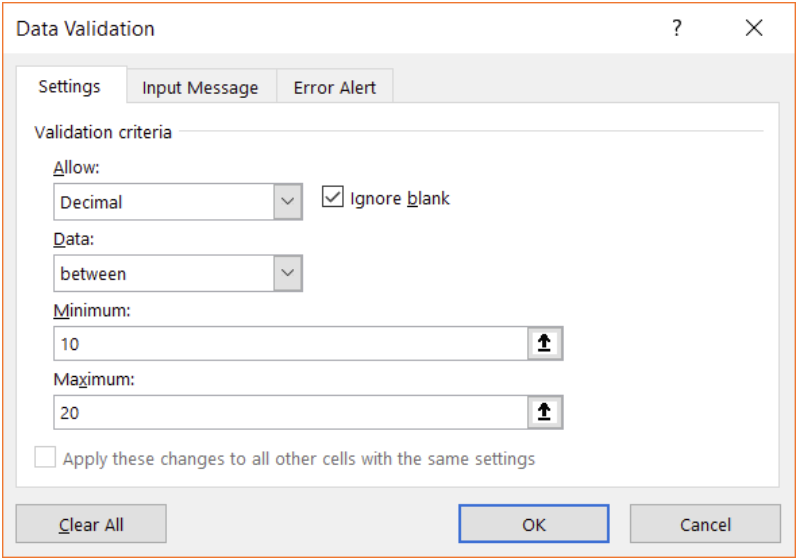
2.) Decimal
For the Price column, you want to allow a price only between $10 and $20, but it can be with a decimal value.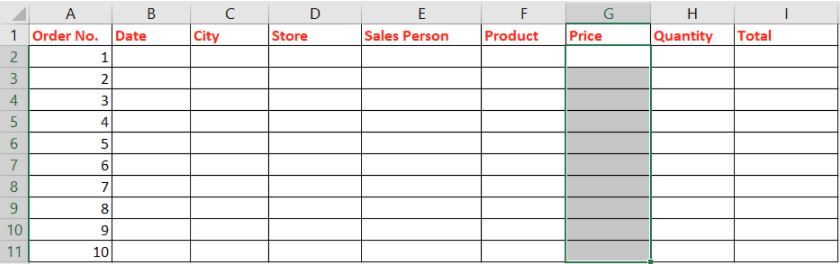
- Choose Decimal, then Between
- Minimum as 10, Maximum as 20

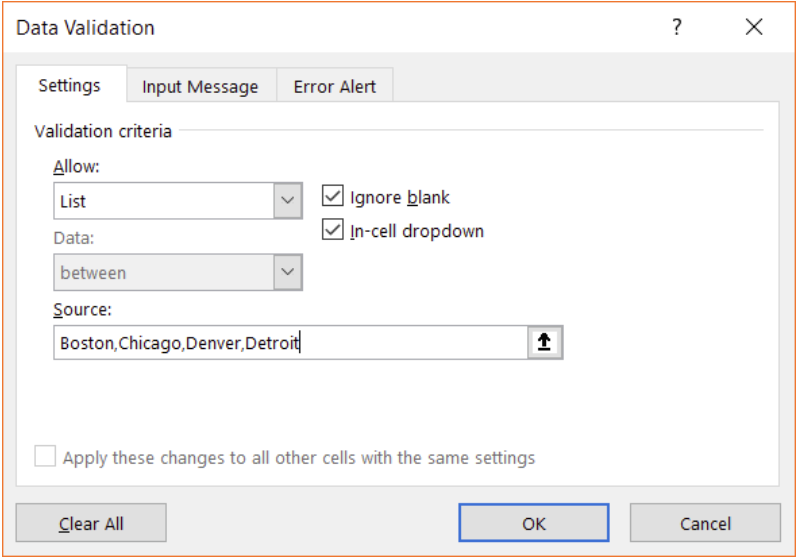
3.) List – Dropdown
How to use Data Validation list in Excel?
For the columns of City, Store and Product, we can create a list to select from.
Thus, the user cannot enter anything they want, they have to only select from the provided list.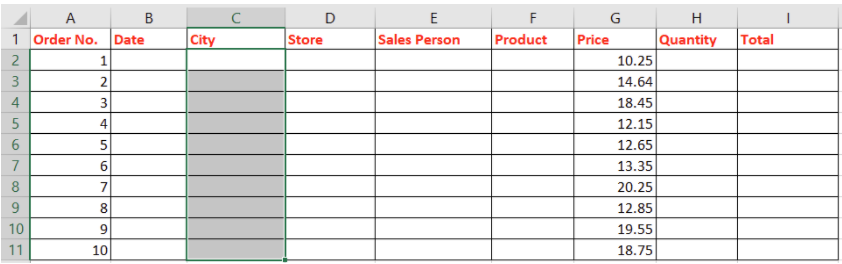
We will take City here, follow the same for Store and Product as well.
- Select List in Allow
- In Source, enter the values with Comma separation

After you have applied the validation, the user can select from the list like this,
We now know how to use Data Validation in Excel to use as a dropdown list.
Alternatively, instead of entering comma separated values, you can even make a list of items in Excel sheet, and then in source, select those cells as reference.
But this is only possible in Data Validation in Excel 2010 or Excel 2013 or Excel 2016. It is not available in Data Validation in Excel 2007.
4.) Date
In the Date column, you want to allow a date which is either Today or anything before today. You don’t to allow a future date entry.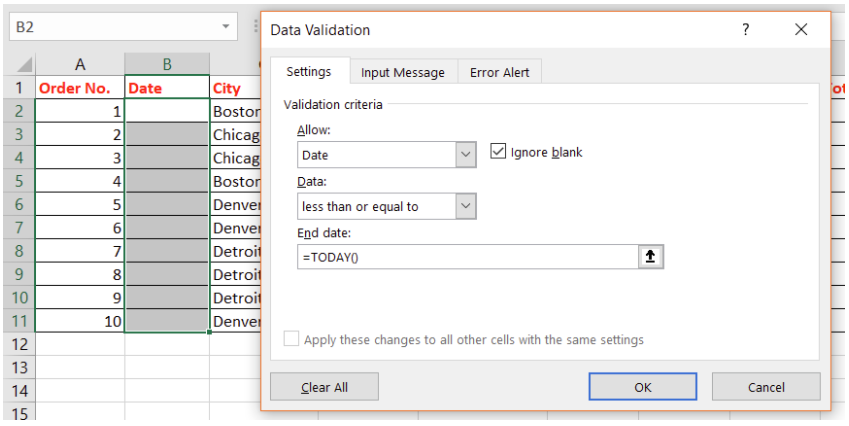
The =TODAY() makes Excel find the current date on a daily basis dynamically, not any 1 particular date.
Alternatively, you could just enter a particular date as well, if you do not want it to be dynamic.
how to use Data Validation in Excel for Time options are very similar to how we applied Data Validation in Excel for Dates.
5.) Text Length
We can restrict the number of characters (text length). In Sales Person column, let’s allow entry of only upto 30 characters.
If you enter more than 30 characters, an error message will pop up.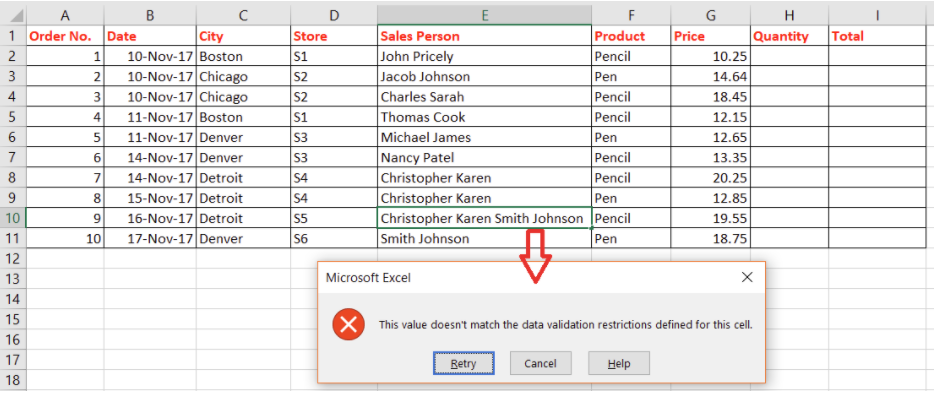
Quantity can have Whole number validation.
Total column does not need any validation as it will be a formula.
This way, you can use the direct simple methods of Data Validation.
How to use Data Validation in Excel for Complex Criteria
Why do we use Data Validation in Excel for complex criteria as well?
If we want the user enter data in a very specific manner, which is not directly available in the simple options, we build them using the last option, ‘Custom’, where we can build complex criteria using formulae. So now, we will learn how to use formula in Data Validation in excel
We will learn 3 examples here,
A.) Disallow Duplicate Entry in Order No. Column 
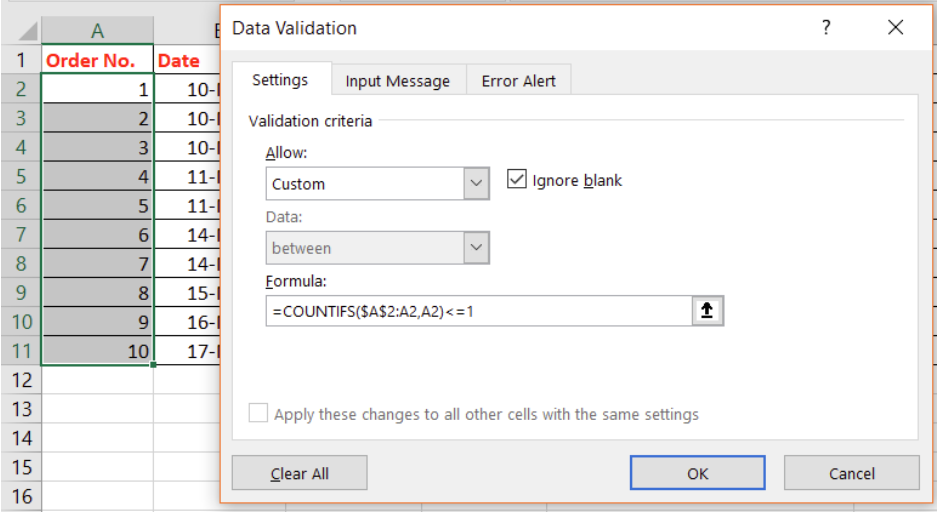
Once this formula is entered into the Custom Formula box, the user will not be able to enter any value more than once.
Here, the user tried to enter the Order No. 4 twice, and received an error in return.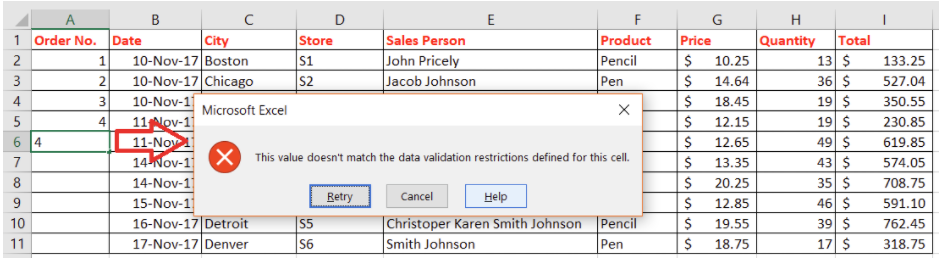
How the formula works is, the COUNTIFS functions scrolls through the A column and find the count of no. of times a value is present in that column until then. If the count is <=1, it will allow, else disallow and throw the error.
B.) Store ID should start with the letter ‘S’
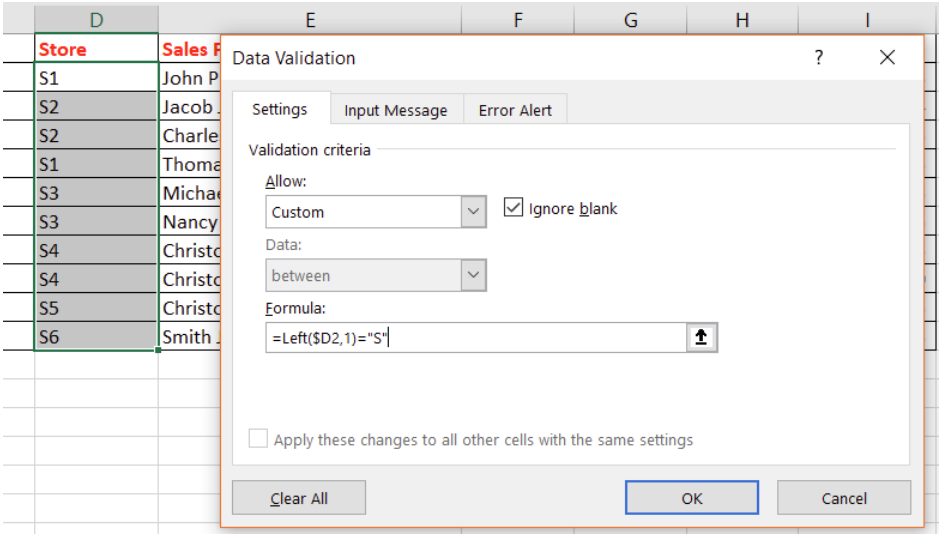
This formula will extract the 1st character from each entry in the D column and check if that character is “A” or not. If it is A, it will allow, else disallow and throw an error.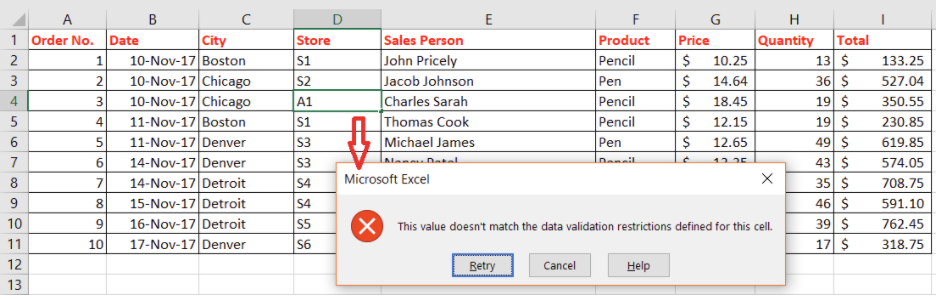
C.) Product Column Cannot have Spaces in the Text 
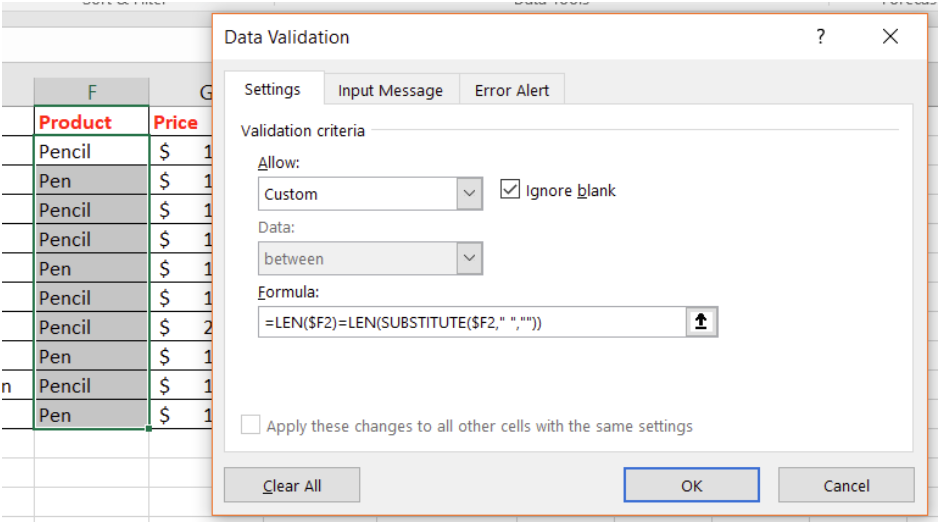
In this formula, first the LEN(F2) finds the number of characters in the text entered in that cell.
Then, LEN(SUBSTITUTE(F2,” “,””)) is meant to replace and spaces “ “ with nothing “” in the text entered in that cell.
After, both formulas are equated LEN=LEN to check if the number of characters in both cases are same or not.
If they are same, entry will be allowed, else rejected with an error thrown up.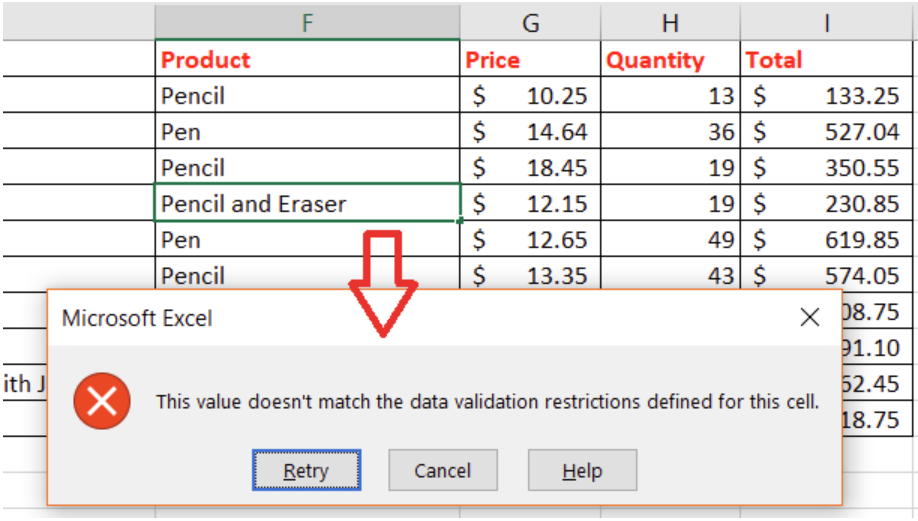
Customizing the Error Message
For any Data Validation that you have applied, you can modify the text in the Error message.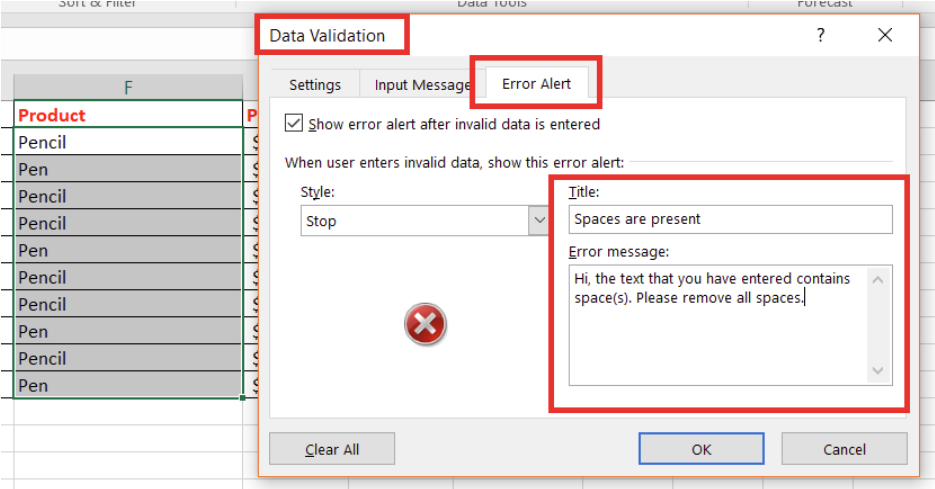
Thus, whenever a wrong entry is done by the user, the customized error message will show up.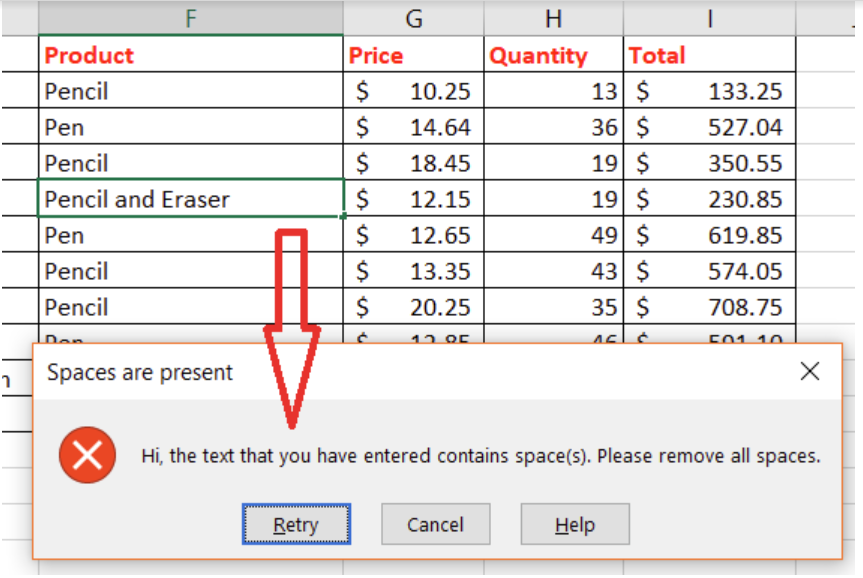
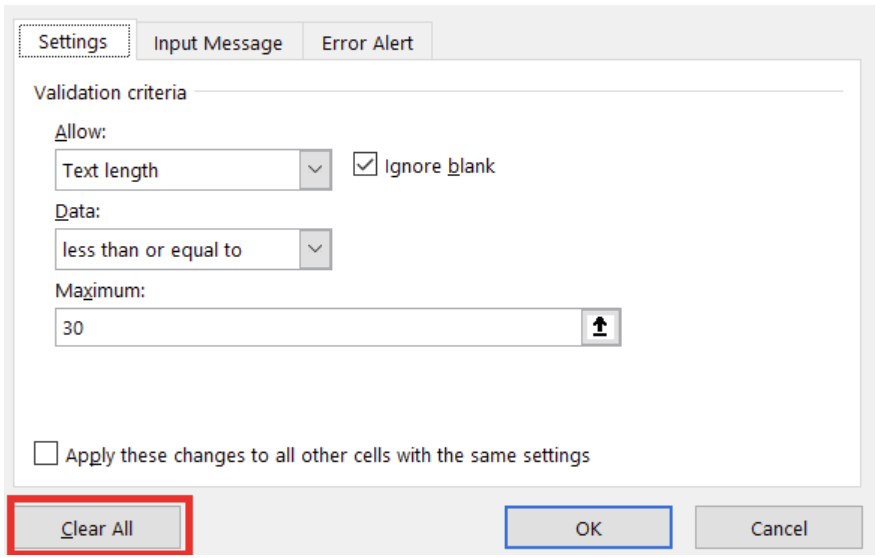
How to Remove Data Validation in Excel
- Select the cells from which you want to remove
- Go to Data Validation
- Click on Clear All

Thus, once we learn how to use Data Validation in Excel, we get learn clean and structured data, alongwith notifications for the user when he/she enters something wrong that that helps the user to enter correct data, resulting in standard data entry & systematic reporting.