Did you know that we create 1.7MB data every second?
A huge part of this data consists of images, media, and video files. opencv Image processing in python helps in handling and utilizing image-based data.
With multiple data sets being collected in the organizations every day, image processing in python simply assists in finding a way to utilize this data in the right manner.
Think about Facebook’s auto-tagging. This is achieved through automated image processing. While Facebook doesn’t tag you automatically, it suggests the right person to tag – quite accurately.
To understand how to do image processing in python, read on.
The Basics: Image Processing in Python
Have a look at the image given below:
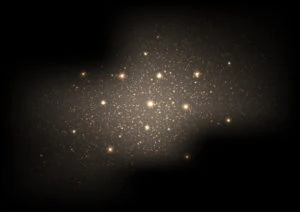
You may have recognized the image of stars in a split second. This is because humans can process images quickly.
However, what if you are asked to count the stars in the sky at night? Can you count the number of stars?
You may count 10, maybe 20 or 50 stars. But, counting the number of stars even in a frame is difficult. For processes like this, you can use and learn image processing in python.
Let’s see how:
1. Firstly, import the libraries you need for image processing in python. For example, you may have to import matplotlib, data from skimage, blob_dog, blob_doh, and blog_log from skimage.feature.
2. Then, you should import image to python. It is necessary to understand that every image you import to python is greyscale. This means that every pixel of the image is a shade of grey only and every pixel consumes one cell of the matrix.
3. Now, to find the objects in a picture, you need to write some commands to search continuous objects in an image. For instance, the blobs_log offers three outputs in total. Two outputs are coordinates, and one is the object’s area.
Depending upon the type of image processing you are implementing, the libraries, commands, and processes differ. Check out the image processing in the python tutorial mentioned below to understand the process in detail.
How to Do Image Processing in Python?
To start image processing in python, you need to install OpenCV first. Here’s how you can do it:
Usually, it is feasible to install python packages and modules of PyPI repository with the help of pip utility. Many developers prefer using this method because it takes care of dependency checking.
To install OpenCV, you can use the following command:
$ pip install opencv-python
In a few minutes, OpenCV will install fully. You can start processing your images after this. Let’s see how:

1. Rotate
For rotating an image, cv2 module should be imported for ease.
Hence, use import cv2 for this.
Now, you need to read the image through imread() of cv2. You should also specify the path to finding the image and store this picture in a variable of choice.
Image = cv2.imread(“getimg.jpg”)
This image is now a matrix which has columns and rows. If you use type to find the image’s type, this is what you will get.
>>>print(type(image))
<class ‘numpy.ndarray’>
OpenCV creates numpy arrays which are easier to access and use.
If you want to show the image, you can use imshow() for it.
cv2.imshow(‘Original Image’, image)
cv2.waitkey(0)
After this, we will move towards rotating the image. Follow the steps:
· Use ht, wid = image.shape[0:2]. This will give you the height and width of the image.
· You need to get the rotation matrix after this. For that, use rotMat = cv2.getRotationMatrix2D(( wid/2, ht/2), 90, .5).
· Finally, to get the rotated image, use RImage = cv2.warpAffine(image, rotMat, (wid, ht)).
You will get the rotated image when you show this RImage.
2. Crop
The starting of image processing in python for cropping the image is similar.
You need to import cv2, create Image = cv2.imread(“getimg.jpg”), and find its height and width ht, wid = image.shape[0:2].
To crop the image, you need to define the start and end of the column and row. Usually, we refer to the percentage values of columns and rows. Here’s how you can do it:
startRow = int(height*.20)
endRow = int(height*.80)
startCol = int(height*.20)
endCol = int(height*.80)
To use these values for the image, here’s the command:
CImage = image[startRow:endRow, startCol:endCol]
When you display this image, you will get the cropped image as per the matrix rows and columns you defined above.
3. Resize
Again, you need to import cv2 and create Image = cv2.imread(“getimg.jpg”).
Once the cv2 is imported, use resize.
NewImage = cv2.resize(image, (0,0), fx=0.50, fy=0.50)
After this, use imshow to view the resized image.
Other than the above method of resizing and image processing in python, you can also resize the image using column and row.
NewImage = cv2.resize(image, (500, 300))
cv2.imshow(‘Resized Image’, NewImage)
cv2.waitkey(0)

4. Adjust
While there is no way to adjust the image and its contrast using OpenCV, there is an equation that you can use. This equation is:
NewImage = x*OriginalImage + y
X is the image contrast which you can define. If this is 1, then there is no contrast. When this is greater than 1, then the contrast is high. When it is lower than 1, the contrast is low.
Y’s value ranges from -127 to +127.
Other than the above equation, you also need to utilize addWeighted() to create output in 0-255 range.
Follow the below steps to adjust the contrast of the image:
· Import cv2
· Import numpy as nu
· Image = cv2.imread(“getimg.jpg”)
· CImage = cv2.addWeighted(image, 2.0, nu.zeros(image.shape, image.dtype), 0, 0)
· cv2.imshow(‘Original Image’, Image)
· cv2.imshow(‘Contrast Image’, CImage)
· cv2.waitkey(0)
5. Blur
To learn image processing in python and make an image blurry, follow the steps.
The first two steps are the same as we have followed it in the above 4 image processing in python methods.
· Import cv2
· Image = cv2.imread(“getimg.jpg”)
· BImage = cv2.GaussianBlur(Image, (5,5), 0)
· cv2.imshow(‘Original Image’, Image)
· cv2.imshow(‘Blur Image’, BImage)
· cv2.waitkey(0)
However, remember that in Gaussian blur, you need to use a positive and odd number for the height and width of the kernel.
Further, if you have salt and pepper type of noise in the picture, then you need to use median blur.
· Import cv2
· Image = cv2.imread(“getimg.jpg”)
· BImage = cv2.MedianBlur(Image,5)
· cv2.imshow(‘Original Image’, Image)
· cv2.imshow(‘Blur Image’, BImage)
· cv2.waitkey(0)
6. Convert to Greyscale
If you wish to convert an image to greyscale during image processing in python, the easiest method is to do it while importing the image.
Image = cv2.imread(“getimg.jpg”, 0)
However, there is another method of doing it as well, through BGR2GRAY.
Here’s how you can use BGR2GRAY of cv2 to convert an image to greyscale.
· Import cv2
· Image = cv2.imread(“getimg.jpg”)
· GImage = cv2.cvtColor(Image, cv2.COLOR_BGR2GRAY)
· cv2.imshow(‘Original Image’, Image)
· cv2.imshow(‘Grey Scale Image’, GImage)
· cv2.waitkey(0)

7. Centroid
Finding the centre of a picture while image processing in python is a bit tricky. You need to convert the picture to greyscale first. For this, we will use the same command as above:
· import cv2
· Image = cv2.imread(“getimg.jpg”)
· GImage = cv2.cvtColor(Image, cv2.COLOR_BGR2GRAY)
After this, your greyscale image will be stored in GImage, which we will use later.
Before actually finding the centroid, we will calculate the moments and then find x and y coordinates through these moments. Let’s see how:
· Mome = cv2.moments(GImage)
· XCor = int(mome [“m10”]/ mome[“m00”])
· YCor = int(mome [“m01”]/ mome[“m00”])
We have the centre now. Using the circle of cv2, we will make a circle around the centroid of the image.
· Cv2.circle(image, (XCor, YCor), 10, (color), 0.5)
· cv2.imshow(‘Centroid of Image’, Image)
· cv2.waitkey(0)
Creating a circle() around the centroid requires you to take the Image, X-Y coordinates, size of the circle, colour of the circle, and thickness of the circle. Depending upon your requirements, you can change values during image processing in python in the above method.
8. Mask
Masking an image means placing one image over the original image or changing or modifying the pixel values of the picture.
To mask an image, the HoughCircles() method of the cv2 can be utilized. But, before that, you need to find the Hough Gradient with the help of the following equation:
Radius2 = (x – xcenter)2 + (y – ycenter)2
Using the above equation, it is possible to find circles in our picture. After knowing the circles in the picture, we can mask the picture. Here’s how to do masking and image processing in python:
· import cv2
· Import numpy as nu
· ImageA = cv2.imread(“getimg.jpg”)
· ImageB = cv2.cvtColor(Image, cv2.COLOR_BGR2GRAY)
· GImage = cv2.medianBlur(cv2.cvtColor(Image, cv2.COLOR_RGB2GRAY), 2)
· Cir = cv2.HoughCircles(GImage, cv2.HOUGH_GRADIENT, 1, 20, par1=50, par2=50, minRa=0, maxRa=0)
· Cir = nu.uint16(nu.around(cir))
· Mask = nu.full((ImageA.shape[0], ImageA.shape[1]), 0, dtype = nu.uint8)
· For x in cir[0;:]:
· Cv2.circle(mask, (x[0], x[1]), x[2], (255,255,255), -1)
· MImage =cv2.bitwise_or(ImageA, ImageB, masking = mask)
The resultant of these commands will be a masked image.

9. Colour Detection
You can detect colours in your image using cv2 modules.
The starting steps remain the same here too:
· import cv2
· Import numpy as nu
· Image = cv2.imread(“getimg.jpg”)
After reading the picture, you need to convert the image to HSV.
· HImage = cv2.cvtColor(Image, cv2.COLOR_BGR2HSV)
Using cv2.imshow(“HSV Image”, HImage), you can show the image.
After converting the image to HSV, use NumPy array for upper and lower red values. You can also create arrays for other colours present in the image such as yellow or green.
· LRed = nu.array(30,150,50)
· URed = nu.array(255,255,180)
Use the inRange() method to find out if the given array elements fall in the range of lower and upper boundaries.
· Mask = cv2.inRange(HImage, LRed, URed)
This will find the red color, which you can display with:
· cv2.imshow(“Original Image”, Image)
· cv2.imshow(“Red Color Image”, Mask)
· cv2.waitkey(0)
10. Noise Reduction
While image processing in python offers multiple noise reduction methods, we will reduce noise in the image using fastNIMeansDenoisingColored().
Other methods you can use are:
· fastNIMeansDenoising()
· fastNIMeansDenoisingMulti()
· fastNIMeansDenoisingColoredMulti()
The starting steps for reducing noise during image processing in python is the same:
· Import cv2
· Image = cv2.imread(“getimg.jpg”)
After this, when you are using the fastNIMeansDenoisingColored(), we require an original image, destination, strength of the filter, the value of the image for removal of colored noise, patch size (keep this odd, always), and window size.
· NImage = cv2. fastNIMeansDenoisingColored(Image, None, F, V, P, W)
· cv2.imshow(“Original Image”, Image)
· cv2.imshow(“Denoised Image”, NImage)
· cv2.waitkey(0)
11. Contour
Contours are actually the image curves that are utilized to join points in a picture. Hence, contours are used to detect an object in an image.
We will start the process by importing cv2 and converting the image to greyscale.
· Import cv2
· Image = cv2.imread(“getimg.jpg”)
· GImage = cv2.cvtColor(Image, cv2.COLOR_BGR2GRAY)
After converting the image to greyscale using image processing in python, find out the image’s threshold.
· RT, threshold = cv2.threshold(GImage, 127,255,0)
· ImageC, _ = cv2.findContours(threshold, cv2.RETR_TREE, cv2.CHAIN_APPROX_SIMPLY)
· Cv2.drawContours(Image, ImageC, -1,(0,255,0))
· cv2.imshow(“Contour Image”, Image)
· cv2.waitkey(0)

12. Background Removal
The last function we will learn in this image processing in python tutorial is background removal.
The processing of removing the background of the image includes a lot of steps and it is difficult. Thus, follow the steps below for correct execution:
· Import cv2
· Import numpy as nu
· Image = cv2.imread(“getimg.jpg”)
· GImage = cv2.cvtColor(Image, cv2.COLOR_BGR2GRAY)
In these steps, we have imported cv2 modules and converted the image to greyscale.
· _,threshold = cv2.threshold(GImage, 127,255, cv2.THRESH_BINARY_INV + cv2.THRESH_OTSU)
The argument is different here as compared to the above section because we are defining threshold style. Check this document for further reference.
· ImageC = cv2.findContours(threshold, cv2.RETR_TREE, cv2.CHAIN_APPROX_SIMPLY)[-2]
· ImageC = sorted(ImageC, key=cv2.contourArea)
· For j in ImageC:
· If cv2.contourArea(j)>100:
· Break
In the above steps, we have found the contours of the image and sorted these contours.
· Masking = nu.zeros(img.shape[:2], nu.uint8)
· Cv2,drawContours(masking, [j],-1,255,-1)
· NImage = cv2.bitwise_and(Image, Image, mask=masking)
· cv2.imshow(“Original Image”, Image)
· cv2.imshow(“Image without background”, NImage)
· cv2.waitkey(0)
Conclusion
With images being a major part of the collected data, image processing in python has also become significant. Using python commands and cv2 modules, you can easily process, modify, and analyze data given in images.
To understand how you can achieve this, read the above image processing in python tutorial and execute these commands to rotate, remove background, blur, and mask the image. Once you can execute these basic commands, you can move forward to advanced image processing in python.