Python is a high-level language expressed with a simple syntax. This makes learning easy for new programmers. Some Python libraries can handle unstructured sources of data such as PDFs. Useful information such as audio, video, connections, buttons, business logic, and form fields can be found in PDFs.
For displaying and sharing files, PDF or Portable File Format is a file format. The PDF was developed by Adobe but is now maintained by the International Organization for Standardization (ISO). You must use the PyPDF2 package while dealing with Python’s PDF. It is a package of pure Python that can be used to perform various PDF operations.
Text analysis comes into play when a PDF is stored. Python is used to model a lot of the code and libraries for Text Analytics. Once the required information has been collected, the data can be used in the Natural Language Processing and Machine Learning system.
Here is a list of libraries that can be used for handling PDF files:
PDFMiner – This library is used to extract useful information from the PDF documents. Unlike other tools, the entire focus of this package is to get and analyze the data.
PyPDF2 – This is a PDF library made of pure Python that can harvest, split, transform and merge PDFs together. There are also options available for adding custom data, passwords, and viewing options to PDF files. You can merge entire PDFs together and retrieve metadata and text from PDF.
Download Detailed Brochure and Get Complimentary access to Live Online Demo Class with Industry Expert.
Tabula-py – It is the tabula-java’s Python wrapper which can be used for reading the tables present in PDF. You can also convert them into DataFrame of Pandas. There is also an option for converting the PDF file into JSON/TSV/CSV file.
Slate – It is PDFMiner’s wrapper implementation.
PDFQuery – It is the light wrapper around pyquery, lxml, and pdfminer. With this, you can extract the data from PDFs reliable without writing long codes.
Xpdf – It is the Python wrapper that is currently offering just the utility to convert pdf to text.
The first pyPDF package was released in 2005. The last update to that package was made in 2010. Then, a company named Phasit created a package named PyPDF2 as a fork of pyPDF. This package was backwards compatible with pyPDF and worked perfectly for several years up to 2016. Then there were a few releases of pyPDF3 which was renamed to PyPDF4 later on.
Almost all of these packages do at the same time. However, there is one major difference between PyPDF2+ and the original pyPDF which is that the former supports Python 3. Even though PyPDF2 was abandoned recently, PyPDF4 is not backwards compatible with it
An alternative to PyPDF2 was created by Patrick Maupin with the name pdfrw. It does most of the things that PyPDF does. The only major difference between the two is that with pdfrw, you can integrate it with ReportLab package that can create a new PDF on ReportLab containing some or all part of a preexisting PDF.
The first step for working with a PDF in Python is installing the package. You can use conda (if you are using Anaconda) or pip (if you are using regular Python) for installing PyPDF2. Here is what you need to do for installing PyPDF2 using pip:
$ pip install pypdf2
The installation process does not take much time as the PyPDF2 package doesn’t have any dependencies. Now, let’s move on to extracting information from PDF.
Extracting

With the PyPDF2, you will be able to extract text and metadata from PDF. This comes in handy when you are working on automating the preexisting PDF files. You can extract the following types of data using the PyPDF2 package:
⇒ Creator
⇒ Author
⇒ Subject
⇒ Producer
⇒ Title
⇒ Number of Pages
To practice this, you need to get a PDF. Any PDF will do the job. In this example, let’s assume that the name of the pdf is example.pdf. Now, here is the code that will get you access to the attributes of the PDF:
# extract_doc_info.py

from PyPDF2 import PdfFileReader

def extract_information(pdf_path):

    with open(pdf_path, 'rb') as f:

        pdf = PdfFileReader(f)

        information = pdf.getDocumentInfo()

        number_of_pages = pdf.getNumPages()

    txt = f"""

    Information about {pdf_path}:

    Author: {information.author}

    Creator: {information.creator}

    Producer: {information.producer}

    Subject: {information.subject}

    Title: {information.title}

    Number of pages: {number_of_pages}

    """

    print(txt)

    return information

if __name__ == '__main__':

    path = 'example.pdf'

    extract_information(path)

Here, you have used the PyPDF2 package for importing PdfFileReader. It is a class containing different methods used to interact with PDF files. In the above example, the instance of DocumentInformation is returned after calling .getDocumentInfo().
All the information you need on the PDF can be extracted by this. For returning the number of pages, you need to call .getNumPages().
The information variable used in the above example has attributes that can be used for extracting the remaining metadata from the document. You can even print the information and save it for future use.
There is an .extractText() function present in the PyPDF package that can be used for extracting text on the page objects.
However, many times this method turns out to be unsuccessful. In some PDF, you will get the text and in other cases, you will get an empty string. The best package for extracting text from PDF in Python is the PDFMiner project which is more robust and is designed specifically to extract from PDF.
Rotating
More than often you would have to deal with PDFs whose pages are in landscape mode instead of portrait mode. Then can even be upside down. This happens when someone creates a document by scanning them. With Python, you will be able to rotate these pages.
Here is an example through which you will be able to understand how to rotate a few pages of a PDF with the PyPDF2 package:
# rotate_pages.py

from PyPDF2 import PdfFileReader, PdfFileWriter

def rotate_pages(pdf_path):

    pdf_writer = PdfFileWriter()

    pdf_reader = PdfFileReader(path)

    # Rotate page 90 degrees to the right

    page_1 = pdf_reader.getPage(0).rotateClockwise(90)

    pdf_writer.addPage(page_1)

    # Rotate page 90 degrees to the left

    page_2 = pdf_reader.getPage(1).rotateCounterClockwise(90)

    pdf_writer.addPage(page_2)

    # Add a page in normal orientation

    pdf_writer.addPage(pdf_reader.getPage(2))

    with open('rotate_pages.pdf', 'wb') as fh:

        pdf_writer.write(fh)

if __name__ == '__main__':

    path = 'example.pdf'

    rotate_pages(path)
In this case, apart from the PdfFileReader, you will also have to import PdfFileWriter as you will have to write a new PDF. The pages that you want to modify are taken in the path through rotate_pages(). This also requires creating a writer object named pdf_writer and a reader object named pdf_reader within the function. Next, you have to get the desired pages for modifications through .
GetPage(). In the above example, we have started from the first page, which is page zero. Then, you pass in 90 degrees after calling .rotateClockwise(), the page’s object. For page two you pass 90 degrees as well after calling .rotateCounterClockwise(). With PyPDF2, you can rotate a page only in increments of 90 degrees. Any other thing would raise an AssertionError.
After every call that you make to the rotation method, you need to call .addPage(). This is done for adding the page’s rotated version to the writer object. The last step is using the .write() for writing out the new PDF. The parameter in this function is a file-like object.
Merging

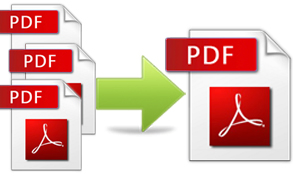
With the PyPDF2 package, you will be able to merge two or more PDFs into a single PDF document. For example, you have several types of reports that need to have a standard cover page. To deal with this type of situation, you might need the help of Python and the PyPDF2 package.
Here, we have mentioned an example where you will be merging PDFs together.
# pdf_merging.py

from PyPDF2 import PdfFileReader, PdfFileWriter

def merge_pdfs(paths, output):

    pdf_writer = PdfFileWriter()

    for path in paths:

        pdf_reader = PdfFileReader(path)

        for page in range(pdf_reader.getNumPages()):

            # Add each page to the writer object

            pdf_writer.addPage(pdf_reader.getPage(page))

    # Write out the merged PDF

    with open(output, 'wb') as out:

        pdf_writer.write(out)

if __name__ == '__main__':

    paths = ['document1.pdf', 'document2.pdf']

    merge_pdfs(paths, output='merged.pdf')
The merge_pdfs() is used when you want to merge a list of PDFs together. You must be aware of the location where you want to save the result. This function takes the input path’s list and the output for it to save the merged output.
As you can see, a loop is created for the inputs and a PDF reader object is created for every input. The next step is iterating over the pages of the PDF file and add all the pages to itself using the .addPage(). After all the pages have been iterated of all the PDFs, the end result is written onto a single PDF.
Another feature of PyPDF2 is that if you don’t want to merge all the pages of the PDF and want to add just a range of pages, you can enhance the script. You can also use the argparse module or Python for creating a command-line interface for the function.
Splitting
The opposite of merging, splitting is taking out a couple of pages from a PDF document. This is very beneficial when you are working with PDFs that have a lot of scanned-in content that might be repeated, you might not just need it or any other good reason that you might have to split the PDF file.
Here is an example of splitting a single PDF into multiple files using PyPDF2:
# pdf_splitting.py

from PyPDF2 import PdfFileReader, PdfFileWriter

def split(path, name_of_split):

    pdf = PdfFileReader(path)

    for page in range(pdf.getNumPages()):

        pdf_writer = PdfFileWriter()

        pdf_writer.addPage(pdf.getPage(page))

        output = f'{name_of_split}{page}.pdf'

        with open(output, 'wb') as output_pdf:

            pdf_writer.write(output_pdf)

if __name__ == '__main__':

    path = 'Jupyter_Notebook_An_Introduction.pdf'

    split(path, 'jupyter_page')
As you can see in the above example, a PDF reader object is created and then a loop for all the pages. A new PDF writer instance is created and a single page is added for every page of the PDF. Then, a uniquely named file is used for writing the page out. After the script is done running, you will have every page of the PDF split into multiple PDFs.
Adding a Watermark
Watermarks are a way to identify patterns and images on digital and printed documents. There are some watermarks that can be seen in just special lighting conditions. Watermarks are an overlay that is really important as they allow protection of intellectual properties like your PDFs or images.
For watermarking your documents you can take the help of Python and the PyPDF2 package. To practice this, you need to have a watermark text or an image to use on the PDF. Take a look at this example:
# pdf_watermarker.py

from PyPDF2 import PdfFileWriter, PdfFileReader

def create_watermark(input_pdf, output, watermark):

    watermark_obj = PdfFileReader(watermark)

    watermark_page = watermark_obj.getPage(0)

    pdf_reader = PdfFileReader(input_pdf)

    pdf_writer = PdfFileWriter()

    # Watermark all the pages

    for page in range(pdf_reader.getNumPages()):

        page = pdf_reader.getPage(page)

        page.mergePage(watermark_page)

        pdf_writer.addPage(page)

    with open(output, 'wb') as out:

        pdf_writer.write(out)

if __name__ == '__main__':

    create_watermark(

        input_pdf='Jupyter_Notebook_An_Introduction.pdf',

        output='watermarked_notebook.pdf',

        watermark='watermark.pdf')
There are three arguments that can be accepted by create_watermark():
Input_pdf: This is the PDF file on which you have to put the watermark.
Output_pdf: This is the path where you will save the PDF with the watermark.
Watermark: This is the PDF where you have saved your watermark text or image.
As you can see in the code, you have to open the watermark PDF and take the first page of the document where the watermark is present. The next step is creating a PDF reader object using an input_pdf and a pdr-writer object to write the PDF with the watermark.
After this, you have to iterate all the pages in the input_pdf. You pass the watermark_page after calling the .mergePage(). This will place the watermark_page on the current page. The last step is to use the pdf_writer object for adding the newly merged page to the PDF and voila! You will have your PDF with the watermark.
Encryption
Currently, you can just add a user and an owner password using the PyPDF2 package. With the owner password, you will have administrative privileges on the PDF. You will also be able to set permissions on the document. The user password allows you to just read the document.
With the PyPDF2, you can set the owner password even though you can set any permission on the document. So, for encrypting the PDF, you can just add the password. Take a look at this example:
# pdf_encrypt.py

from PyPDF2 import PdfFileWriter, PdfFileReader

def add_encryption(input_pdf, output_pdf, password):

    pdf_writer = PdfFileWriter()

    pdf_reader = PdfFileReader(input_pdf)

    for page in range(pdf_reader.getNumPages()):

        pdf_writer.addPage(pdf_reader.getPage(page))

    pdf_writer.encrypt(user_pwd=password, owner_pwd=None,

                       use_128bit=True)

    with open(output_pdf, 'wb') as fh:

        pdf_writer.write(fh)

if __name__ == '__main__':

    add_encryption(input_pdf='reportlab-sample.pdf',

                   output_pdf='reportlab-encrypted.pdf',

                   password='twofish')
The add_encryption() uses the PDF paths for input as well as output and also the password that you have to add to the PDF. Next, a PDF writer is opened and then a reader object. Now, you will have to take an iteration of all the pages of the PDF to create a loop and add them to the writer for encrypting the complete input PDF.
The last step is calling the.encrypt() where you have to put in the owner password, the user password, and whether you want the 128-bit encryption for the PDF file or not. The default setting is the 128-encryption turned on. You will have to set it to False for setting the 40-bit encryption.
According to pdflib.com, the encryption used in PDF is either AES (Advanced Encryption Standard) or RC4. But you have to remember that even after encrypting your PDF, it doesn’t mean that it is secure. There are several tools available that can remove passwords.
Reading Table Data
For reading table data, you have to use the Tabula-py. The first step is installing it first through the following command:
pip install tabula-py
Here is what you need to do is extract the data:
import tabula
# reading the PDF file that contains Table Data
# you can find find the pdf file with complete code in below
# read_pdf will save the pdf table into Pandas Dataframe

df = tabula.read_pdf("offense.pdf")

# in order to print first 5 lines of Table

df.head()
If there are multiple files present in the PDF file, you have to use the following command:
df = tabula.read_pdf(“offense.pdf”,multiple_tables=True)
For extracting specific information from a specific page of the PDF, you need to use this:
tabula.read_pdf(“offense.pdf”, area=(126,149,212,462), pages=1)
For putting the output into a JSON format, you need to try this:
tabula.read_pdf(“offense.pdf”, output_format=”json”)
Use the following command for converting the PDF into a CSV or an Excel file:
tabula.convert_into(“offense.pdf”, “offense_testing.xlsx”, output_format=”xlsx”)
To understand more about working with PDF packages, you can try the following resources:
- The Github page for PyPDF4
- The ReportLab website
- The PyPDF2 website
- Camelot: PDF Table Extraction for Humans
- The Github page for pdfrw
- The Github page for PDFMiner
- Using PyPDF2 for Working with PDF files in Python
- Working with PDF and Word Documents
- The answer to StackOverflow question – How to extract table as text from the PDF using Python?
So overall, you need to understand that the PyPDF2 package is fast and pretty useful. It can be used for automating large jobs and using its capabilities for doing the job better.
Final Thoughts
By taking a Python Programming course you can become a Python coding language master and a very skilled Python programmer. Any aspiring programmer can learn from Python’s basics and proceed after the course to finesse Python.


